Saturday, March 28, 2009

Rainy but fun day in Asheville


I enjoyed the bread festival this morning at Greenlife (with class by Peter Reinhart to follow this afternoon) and a tempeh-lettuce-tomato bagel at Firestorm, the local anarchist, mostly-vegan cafe/bookstore/performance space. I'll have my anarchism with a big dollop of Vegenaise, please.

Cashew Cheese


Don't die of shock. I'm updating again. I really love fermented nut cheese. It has a complexity and depth of flavor that isn't found in most nondairy cheese. Living in Nashville, I can be lazy and buy the wonderful stuff made by Journey to Bliss - and I often do, especially the pistachio cheddar. However, it is easy to make. I learned from the amazing Laura Button, founder of Journey to Bliss. Here's how:

1. Make a grain-based rejuvelac: Put about 1/4 cup (I never measure this) of some whole grain (or grain-equivalent like quinoa) in a quart of water, cover loosely, and let it set on the counter for a couple of days, until it begins to bubble. I stir mine once or twice a day to help it along. This time, I used whole wheat, and left it three days. It gets stronger as it goes, so be mindful. Drain the liquid - this is your rejuvelac. The leftover grain will often sprout, or can be ground up to make crackers, or cooked as cereal, etc.

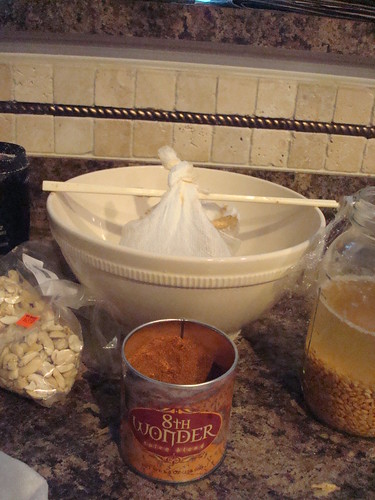
2. Grind up nuts or seeds. A coffee grinder does a good job. I used cashews, as they were on sale at the Indian grocery last week. You have to experiment to see what you like. Sunflower seeds are good, but will oxidize (so don't freak out that the cheese gets dark edges). Almonds can be grainy - so you may want to soak them really well before using. Mix the ground nuts with enough rejuvelac to get a texture close to what you want for your final result. It will lose some moisture while it hangs, but not a huge amount. You can add spices, salt, etc, at this point. I used some kosher salt, and 8th Wonder spice blend (which I discovered thanks to a high school friend who now does omni cooking videos - Ken Blevins).

3. Wrap in cheesecloth and hang over a bowl. I pass chopsticks through the knot - see photo. Leave this out at room temperature for a couple of days - again, it will get stronger with time, so you may want to sample as you go. When fermented enough for you, refrigerate and it will keep several weeks.
As you can see in the photo, my batch of cashew cheese is of the soft, spreadable sort. You can make a firmer block. I haven't tried to make a hard cheese like Dr. Cow Tree Nut Cheese - that's a project for another day!

Monday, March 23, 2009

Dehydrator Fun


I haven't blogged in forever. I fail. Anyhow.... Susie and I agreed to update our neglected blogs, so here I go:


When my tax refund arrived, I headed right to EverydayDish, my favorite source for amazing cooking equipment. One of my purchases was an Excalibur food dehydrator, which I bought with a mind to use it for some raw food recipes. However, I am discovering that it makes a great incubator for soy yogurt, tempeh, salt rising bread starter, and other fermented projects that need a warm temperature below what the oven can offer.


My mother used to dehydrate lots of apples when I was a kid. (We had a bunch of trees.) Yesterday, I processed two big bags of apples in the dehydrator. Not only are they tasty on their own, but they can be used to make a delightfully unhealthy treat - fried pies. Around here, THE filling for fried pies is based on dried apples. This is my great-aunt's non-recipe:


Take 1 quart of dried apples, add just a little water, and cook in a saucepan till tender. You can add sugar, cinnamon, or whatever else you like. Mash the results until you have a fairly thick paste.


Make a double batch of your favorite pie crust. Take a ball of dough (golf ball size or bigger), and roll out into a flat circle. Cover one side with the apple mixture (leave space around the edges), then fold over and seal with a fork.


To cook: Heat vegetable shortening in a dutch oven - maybe an inch or so of melted fat. Fry the pies until brown on one side, then flip, and fry the other side. The second side goes a lot faster. If this is too terrifying, brush with melted margarine and bake at 400 until they look done.


Enjoy!

Sunday, November 30, 2008

More testing...


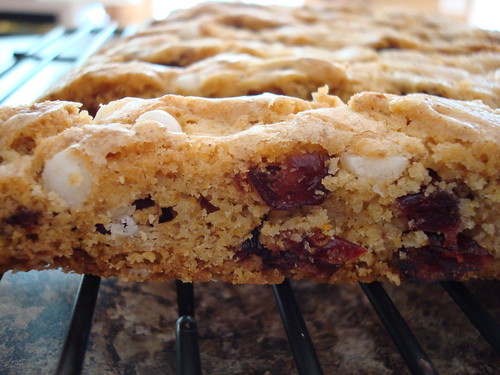
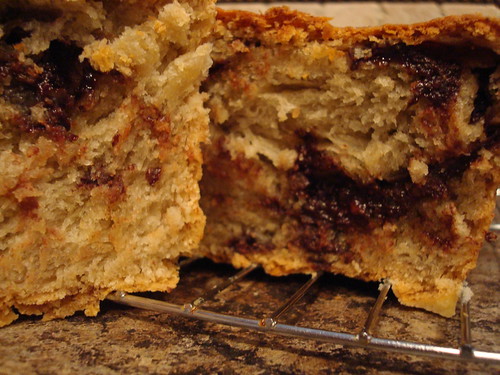
I know. It's mean to post testing photos, but I can't resist. Here is another biscotti recipe for Isa and Terry's cookie book, and a chocolate cinnamon babka (yes, vegan babka) for Peter Reinhart.

Faux Korean Noodle Lunch


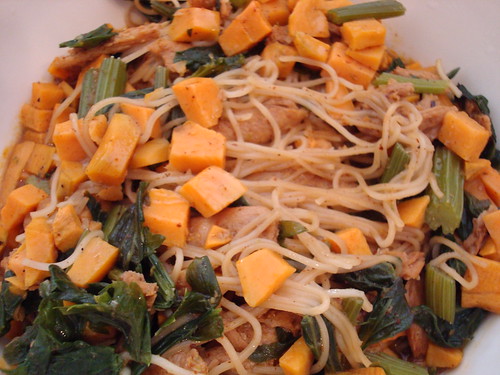
I swear I haven't disappeared. My life was taken over by work and Thanksgiving for a few weeks. Today for lunch I made a fake Korean dish to use up some of the items in our kitchen, loosely inspired by ideas from Copeland Marks' The Korean Kitchen.


I was very happy with the results and am recording what I did as much for my future use as for the benefit of anyone reading this. Here goes:


Rehydrate half a package of Soy Curls according to package directions. Drain well and press out excess liquid. Mix the Soy Curls with sesame oil, soy sauce, and chili powder to taste. (Korean chili powder is really hot. As I was feeding someone who does not like incendiary food, I used not-hot-at-all American chili powder and it was fine.) Set aside.


Heat a small amount of oil in a large pot. Chop two small sweet potatoes and several ribs of celery (including the leaves). Stir fry these vegetables until they begin to soften. Meanwhile, combine 3 cups of water, 4 small scallions (white and green parts) and 3 cloves garlic in a blender and blend very well. Add this green liquid to the pot, bring to a boil, and cook 10-15 minutes until the vegetables are soft. Then add a small handful of somen (Japanese wheat noodles) and cook a couple more minutes until the noodles are done. Add salt and black pepper to taste, and stir in the Soy Curls (or put them on top if you are feeling fancy).


Tuesday, November 4, 2008

Election Cobbler

The camera is away from home again, but I am sitting here biting my nails over the election. Last night, as I had a bunch of apples (from a relative's trees) and the need to do something ... anything... to keep from refreshing the internet news every two seconds, I made cobbler.

I like fancy cobblers, but this is your plain-jane, straight-up cobbler, the way my Great Aunt Cora did it. This recipe is so easy, you can make it with your mind full of election paranoia (and even with a few drinks in your system, if the evening calls for it).

Preheat your oven to 350. Grease a 9x13 pan. Mix together 1 cup self-rising flour (I did 1 cup white whole wheat flour + 1 1/2 t baking powder + 1/2 t salt), 1 cup sugar (Zulka unrefined, in my case), and 1 cup milk (Almond Breeze unsweeetened original). Pour this into your pan. Spread a quart or more of prepared fruit (peeled, chopped apples) over the batter. Dot with marg or coconut oil or give it a spritz of canola oil. Into the oven for 1 hour. It's done.

Now, you can add all sorts of spices and extracts to the batter and/or the fruit. You can pre-cook the fruit if too hard, and add sugar to it if it is too tart. Eat with ice cream, mimiccreme, soyatoo. Do what you will. But it's plenty good plain and unadorned.

Sunday, November 2, 2008

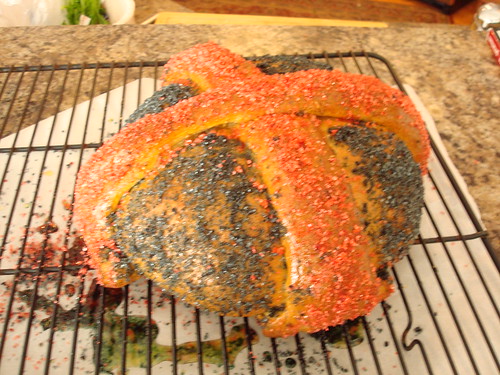
Day of the Dead


Today being the Day of the Dead (All Souls), we made kittee's fabulous recipe for Pan de Muertos (the bread of the dead).


Other Sunday cooking included: braised radishes, cabbage (with onion, garlic, ginger, and panch paran), mixed greens (greek-style with olive oil and lemon), and cranberry relish (just because, even though it goes with nothing else I made). I also made a tofu and vegetable roast as a test recipe for the much-anticipated Yellow Rose Recipes II. Joanna has kindly put a version of the recipe on her blog.